Hugo 主题

SimpleIT Hugo 主题
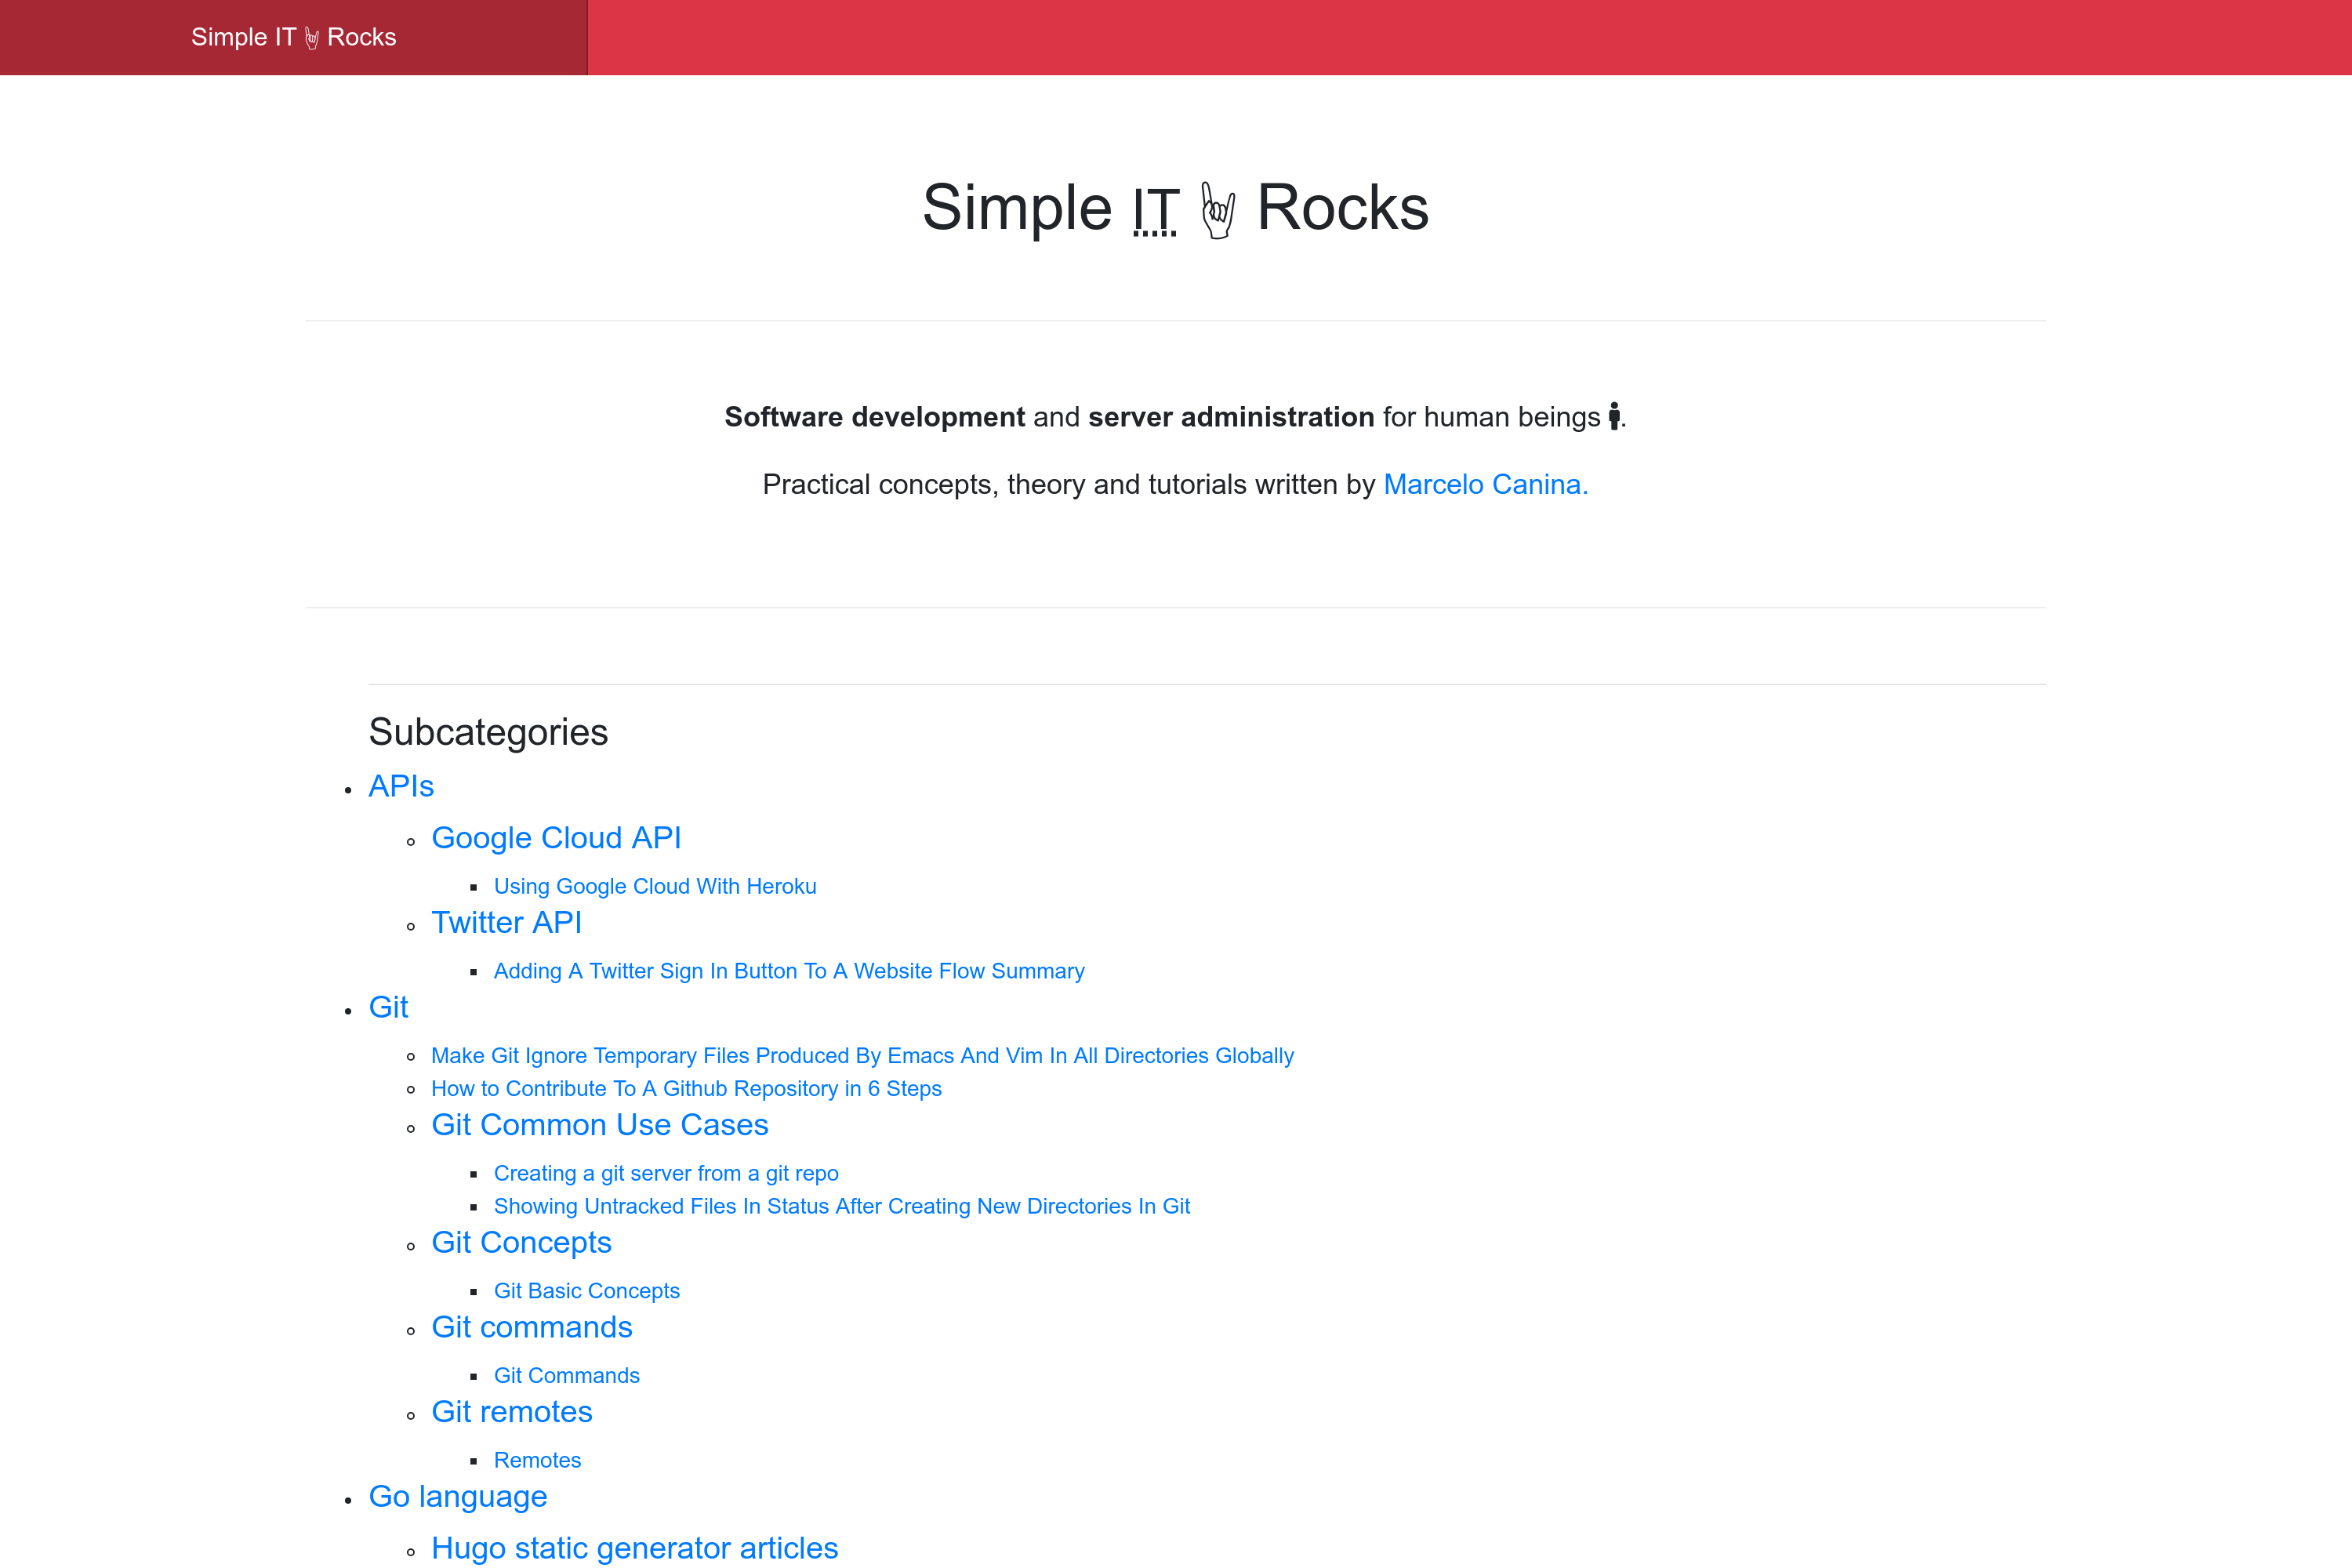
响应式 Hugo 主题,按目录显示文章。
主页显示完整的目录树结构,每个部分/“子部分”都有自己的文章和嵌套部分。
![]()
目录
- SimpleIT Hugo 主题
- 功能
- 嵌套子类别
- 添加内容
- 添加没有图像的文章
- 添加带有图像的文章
- 添加多个文章中使用的图像
- 添加多语言页面
- 安装
- 作为 git 子模块
- 如果你的 Hugo 没有 git
- 更新主题
- 在本地运行
- 主题配置
- 子目录中的网站
- 为你的网站自定义样式
- 开发者须知
- 构建
- 屏幕截图
- 贡献
- 使用该主题的网站
- 参考
- 许可证
功能
功能
移动优先设计
两种主要布局
- 单页
- 基于放置在侧边栏中的内容标题的自动 TOC
- 选择分享按钮类型
- 针对加载速度优化的静态按钮
- 使用 https://sharingbuttons.io/ 生成(快速,最小的占用空间)
- 评论系统
- Disqus
- 目录/类别列表
- 如果存在
/static/img/cover.jpg,则将其添加为主页标题部分的背景
- 如果存在
- 单页
SEO
- Hugo 内部模板
- Open Graph
{{- template "_internal/opengraph.html" . -}}
- Schema 元标记
{{- template "_internal/schema.html" . -}}- 当文章更新时,它会自动生成
dateModifieditemprop,并在文章中显示上次更新的信息。它从 git 存储库中获取数据。
- Twitter 卡片
{{- template "_internal/twitter_cards.html" . -}}
- Open Graph
- 产生
- 最小化的 HTML
- 在一个 CSS 文件中编译的 SASS
- 一个 javascript 文件
- 多语言:
- 在
head中:每个页面都在 meta 中指定其他语言版本,如在告诉 Google 关于你的页面的本地化版本 中指定的那样:-<link rel="alternate" hreflang="lang_code" href="url_of_page" /> - 在
footer中:显示其他页面翻译,如果特定页面没有翻译,则回退到站点可用的语言
- 在
- Hugo 内部模板
分析
- Google Analytics
- Bing
盈利
- Google Adsense
- 页面级别
- 只需设置配置键即可自动广告
- 文章中的可选支持按钮
- 请我喝咖啡
- Ko-fi id
- Google Adsense
支持任意深度的树目录结构中的内容
- 嵌套目录,每个目录都有自己的文章和可能的其他目录
第三方应用程序
- Twitter Bootstrap 4
- 图标:Fontawesome 5
每篇文章的作者框。
- 仅当配置中的
[params.author]中设置了bio时才会在页面中显示。 - 可以使用 frontmatter 隐藏:
hide_author: true
- 仅当配置中的
如果为每种语言在配置中设置了
page_about_me_relurl,则在页脚中显示关于我页面。[languages] [languages.en] page_about_me_relurl = "/about/"显示单个文章时的上一页/下一页文章按钮。
为每个 目录/子目录 生成一个
rss+xmlAtom 文件,一种基于 XML 的 Web 内容和元数据联合格式。- 例如,URL:
https://simpleit.rocks/python/django/index.xml"包括link:<link href="https://simpleit.rocks/python/django/index.xml" rel="alternate" title="Simple IT 🤘 Rocks" type="application/rss+xml"/>
- 例如,URL:
嵌套子类别
嵌套子类别(又名:部分/嵌套部分)获得与目录结构相同的 URL,例如,以下目录/文件将在这些 URL 上可用
PATH                                            URL

exampleSite/content/
|-- en
|   |-- _index.md                               /
|   |-- a-root-level-article.md                 /a-root-level-article/
|   |-- about.md                                /about/
|   |-- bar-first-level-section                 /bar-first-level-section/
|   |   `-- bar-page-in-section.md              /bar-first-level-section/bar-page-in-section/
|   |-- baz-first-level-section
|   |   `-- _index.md                           /baz-first-level-section/
|   `-- foo-first-level-section
|       |-- _index.md                           /foo-first-level-section/
|       |-- foo-second-level
|       |   |-- _index.md                       /foo-first-level-section/foo-second-level/
|       |   |-- foo-third-level
|       |   |   |-- _index.md                   /foo-first-level-section/foo-second-level/foo-third-level/
|       |   |   `-- page-at-foo-third-level.md  /foo-first-level-section/foo-second-level/foo-third-level/page-at-foo-third-level/
|       |   `-- page-at-foo-second-level.md     /foo-first-level-section/foo-second-level/page-at-foo-second-level/
|       `-- page-at-section-level.md            /foo-first-level-section/page-at-section-level/
`-- es
    |-- _index.md                               /es/
    `-- foo-seccion-primer-nivel
        |-- _index.md                           /es/foo-section-primer-nivel
        `-- foo-segundo-nivel
            |-- _index.md                       /es/foo-section-primer-nivel/foo-segundo-nivel
            `-- pagina-en-segundo-nivel.md      /es/foo-section-primer-nivel/foo-segundo-nivel/pagina-en-segundo-nivel/
添加内容
$ hugo new <sections>/<article>.md
有两种类型的文章,带有图像的和没有图像的。最干净的方法是为那些带有图像的文章创建一个目录,并将所有文章的图像放在该目录中。
添加没有图像的文章
应在您想要的目录中创建没有封面图像的文章,文件名作为 slug,例如,要创建文章 http://example.com/foo-first-level-section/page-at-foo-first-level,您应该创建文件 /content/foo-first-level-section/foo-second-level/page-at-foo-second-level.md
slug 将从文章的文件名中获得
---
title: "Post example without images"
date: 2019-01-10
subtitle: ''
description: ''
---

## Overview

Here I don't use any image!
添加带有图像的文章
带有图像的文章可以有两种类型的图像
- 封面图像
- 显示在文章的顶部部分
- 在 Facebook 的 OpenGraph / Twitter 卡片 元数据中使用(又名。在这些社交网络中分享文章时将显示的图像)
- 应在文章的前端 matter 中定义。
- 内容图像
- 沿文章内容使用的图像
例如,要创建文章 http://example.com/foo-first-level-section/page-at-foo-first-level,您应该创建带有 slug 名称的目录,并将内容放在目录中,作为 index.md 文件 /content/foo-first-level-section/foo-second-level/page-at-foo-second-level/index.md。
此文章使用的所有图像都放在上述目录中(/content/foo-first-level-section/foo-second-level/page-at-foo-second-level/)
slug 将从文章的目录名称中获得。
要添加封面图像,以便 OpenGraph 和 Twitter 可以显示它,请将元数据添加到 resources 前端 matter 部分,并将图像放在新创建的目录 /content/foo-first-level-section/foo-second-level/page-at-foo-second-level/victor_hugo.jpg 中。
特色图像资源 name 必须为 cover,以便将其用作文章的特色图像。
这遵循 Hugo 为 Twitter 卡片特色图像定义的标准名称。
其余图像应在前端 matter 中的 images 数组中配置,第一个是特色图像。 这将用于 Facebook 的 OpenGraph 元数据和 Twitter 卡片图像部分,以便在共享时显示它们。
在 images 数组中,应使用预先添加到图像名称的 content 目录后的完整路径,因为 Hugo 会预先加载网站的域名。
然后在同一目录中和内容中使用的其他图像 /content/foo-first-level-section/foo-second-level/page-at-foo-second-level/dcu_models.jpg
---
title: "Post example with images in cover and content"
date: 2019-01-10
subtitle: ''
description: ''
images:
- foo-first-level-section/foo-second-level/page-at-foo-second-level/victor_hugo.jpg
- foo-first-level-section/foo-second-level/page-at-foo-second-level/dcu_models.jpg
resources:
- name: cover # this should be the name if you want it to appear as article's featured image and used by OpenGraph and Twitter cards
  src: victor_hugo.jpg
  title: "Portrait photograph of Victor Hugo"
  params: #can be ommited
    license: "Public Domain"
    original: "https://commons.wikimedia.org/wiki/File:Victor_Hugo_by_%C3%89tienne_Carjat_1876_-_full.jpg"
---

## Overview

Hey! I have an image that it is not featured, look:

<img class="img-fluid" alt="model diagram" src="dcu_models.jpg" />
/content/foo-first-level-section/foo-second-level/page-at-foo-second-level/ 的树目录结构将如下所示
.
|_ index.md
|_ dcu_models.jpg
|_ victor_hugo.jpg
添加多个文章中使用的图像
您还可以将图像添加到站点的根目录 /assets/img/,然后直接使用完整路径 /img/.... 引用它们。
例如,对于 /assets/img/ 中的 my_image.png,然后可以在多个文章中使用它:<img class="img-fluid" alt="example image" src="/img/my_image.png" />。
添加多语言页面
要添加新语言,只需在 config.toml 的 [languages] 部分中指定它,并在 /content 中创建一个子目录,如按内容目录进行翻译 中指定的那样。
然后对于每个页面或部分
为 _index 和 页面 设置 translationKey,并将其 slug 作为目录或文件名。我使用我正在翻译的部分/页面的 slug 作为翻译键,例如 /content/en/foo/_index.md
EN:
/content/en/foo/---- translationKey = "foo" ----ES:
/content/es/foo-slug-in-spanish/---- translationKey = "foo" ----
页面的过程相同。
然后,层次结构的每个级别都将具有其他语言的相应页面,并且 子目录 也将被翻译。
安装
作为 git 子模块
$ git submodule add -f https://github.com/marcanuy/simpleit-hugo-theme themes/simpleit-hugo-theme
如果你的 Hugo 没有使用 git
在你的 Hugo 站点文件夹内运行
$ cd themes
$ git clone https://github.com/marcanuy/simpleit-hugo-theme
更新主题
安装主题后,如果你将其添加为 git submodule,可以使用以下命令更新它
git submodule update --remote --merge
在本地运行
为了查看你的站点运行效果,请运行 Hugo 的内置本地服务器。
$ hugo server -t simpleit-hugo-theme
现在在你的浏览器地址栏输入 localhost:1313。
或者在你的配置文件中设置 theme="simpleit-hugo-theme"。
主题配置
请查看 /exampleSite/config.toml 以获取主题自定义选项。
子目录中的网站
如果网站位于像 example.com/blog/ 这样的子目录中,则应使用以下配置生成带有绝对路径的 URL
canonifyURLs = true
为你的网站自定义样式
如果你想更改一些样式以适应你自己的网站需求,请将以下文件复制到你的网站实例并进行编辑
assets/sass/custom_variables.scss:自定义 Bootstrap 使用的变量。assets/sass/styles.scss:你的主要网站样式,其中包含所有可用的 Bootstrap 变量。
或者使用 SCSS include 包含它们
- 对于
custom_variables.scss
@import "../../themes/simpleit-hugo-theme/assets/sass/custom_variables.scss";
对于 styles.scss
@import "../../themes/simpleit-hugo-theme/assets/sass/styles.scss";
开发者须知
如果你计划更改某些内容或为主题开发做出贡献,请记住,此主题使用 npm 来处理软件包,以安装其依赖项
$ cd themes/simpleit-hugo-theme
$ make install
所有 Bootstrap 和 Fontawesome SASS 变量都可用于
自定义变量
在 assets/sass/custom_variables.scss 中,你可以自定义 Bootstrap。
在 assets/sass/styles.css 中使用变量
例如,在
assets/sass/styles.scss中使用 Fontawesome 变量,如$fa-var-twitter.twitter { @include fa-icon; @extend .fab; &:before { content: fa-content($fa-var-twitter); } }或在
assets/sass/styles.scss中使用 Bootstrap 变量,如$kbd-bg.shell { background-color: $kbd-bg; }
构建
构建或服务网站
$ cd themes/simpleit-hugo-theme
$ make build
服务带有更改的主题
$ cd themes/simpleit-hugo-theme
$ make serve
屏幕截图
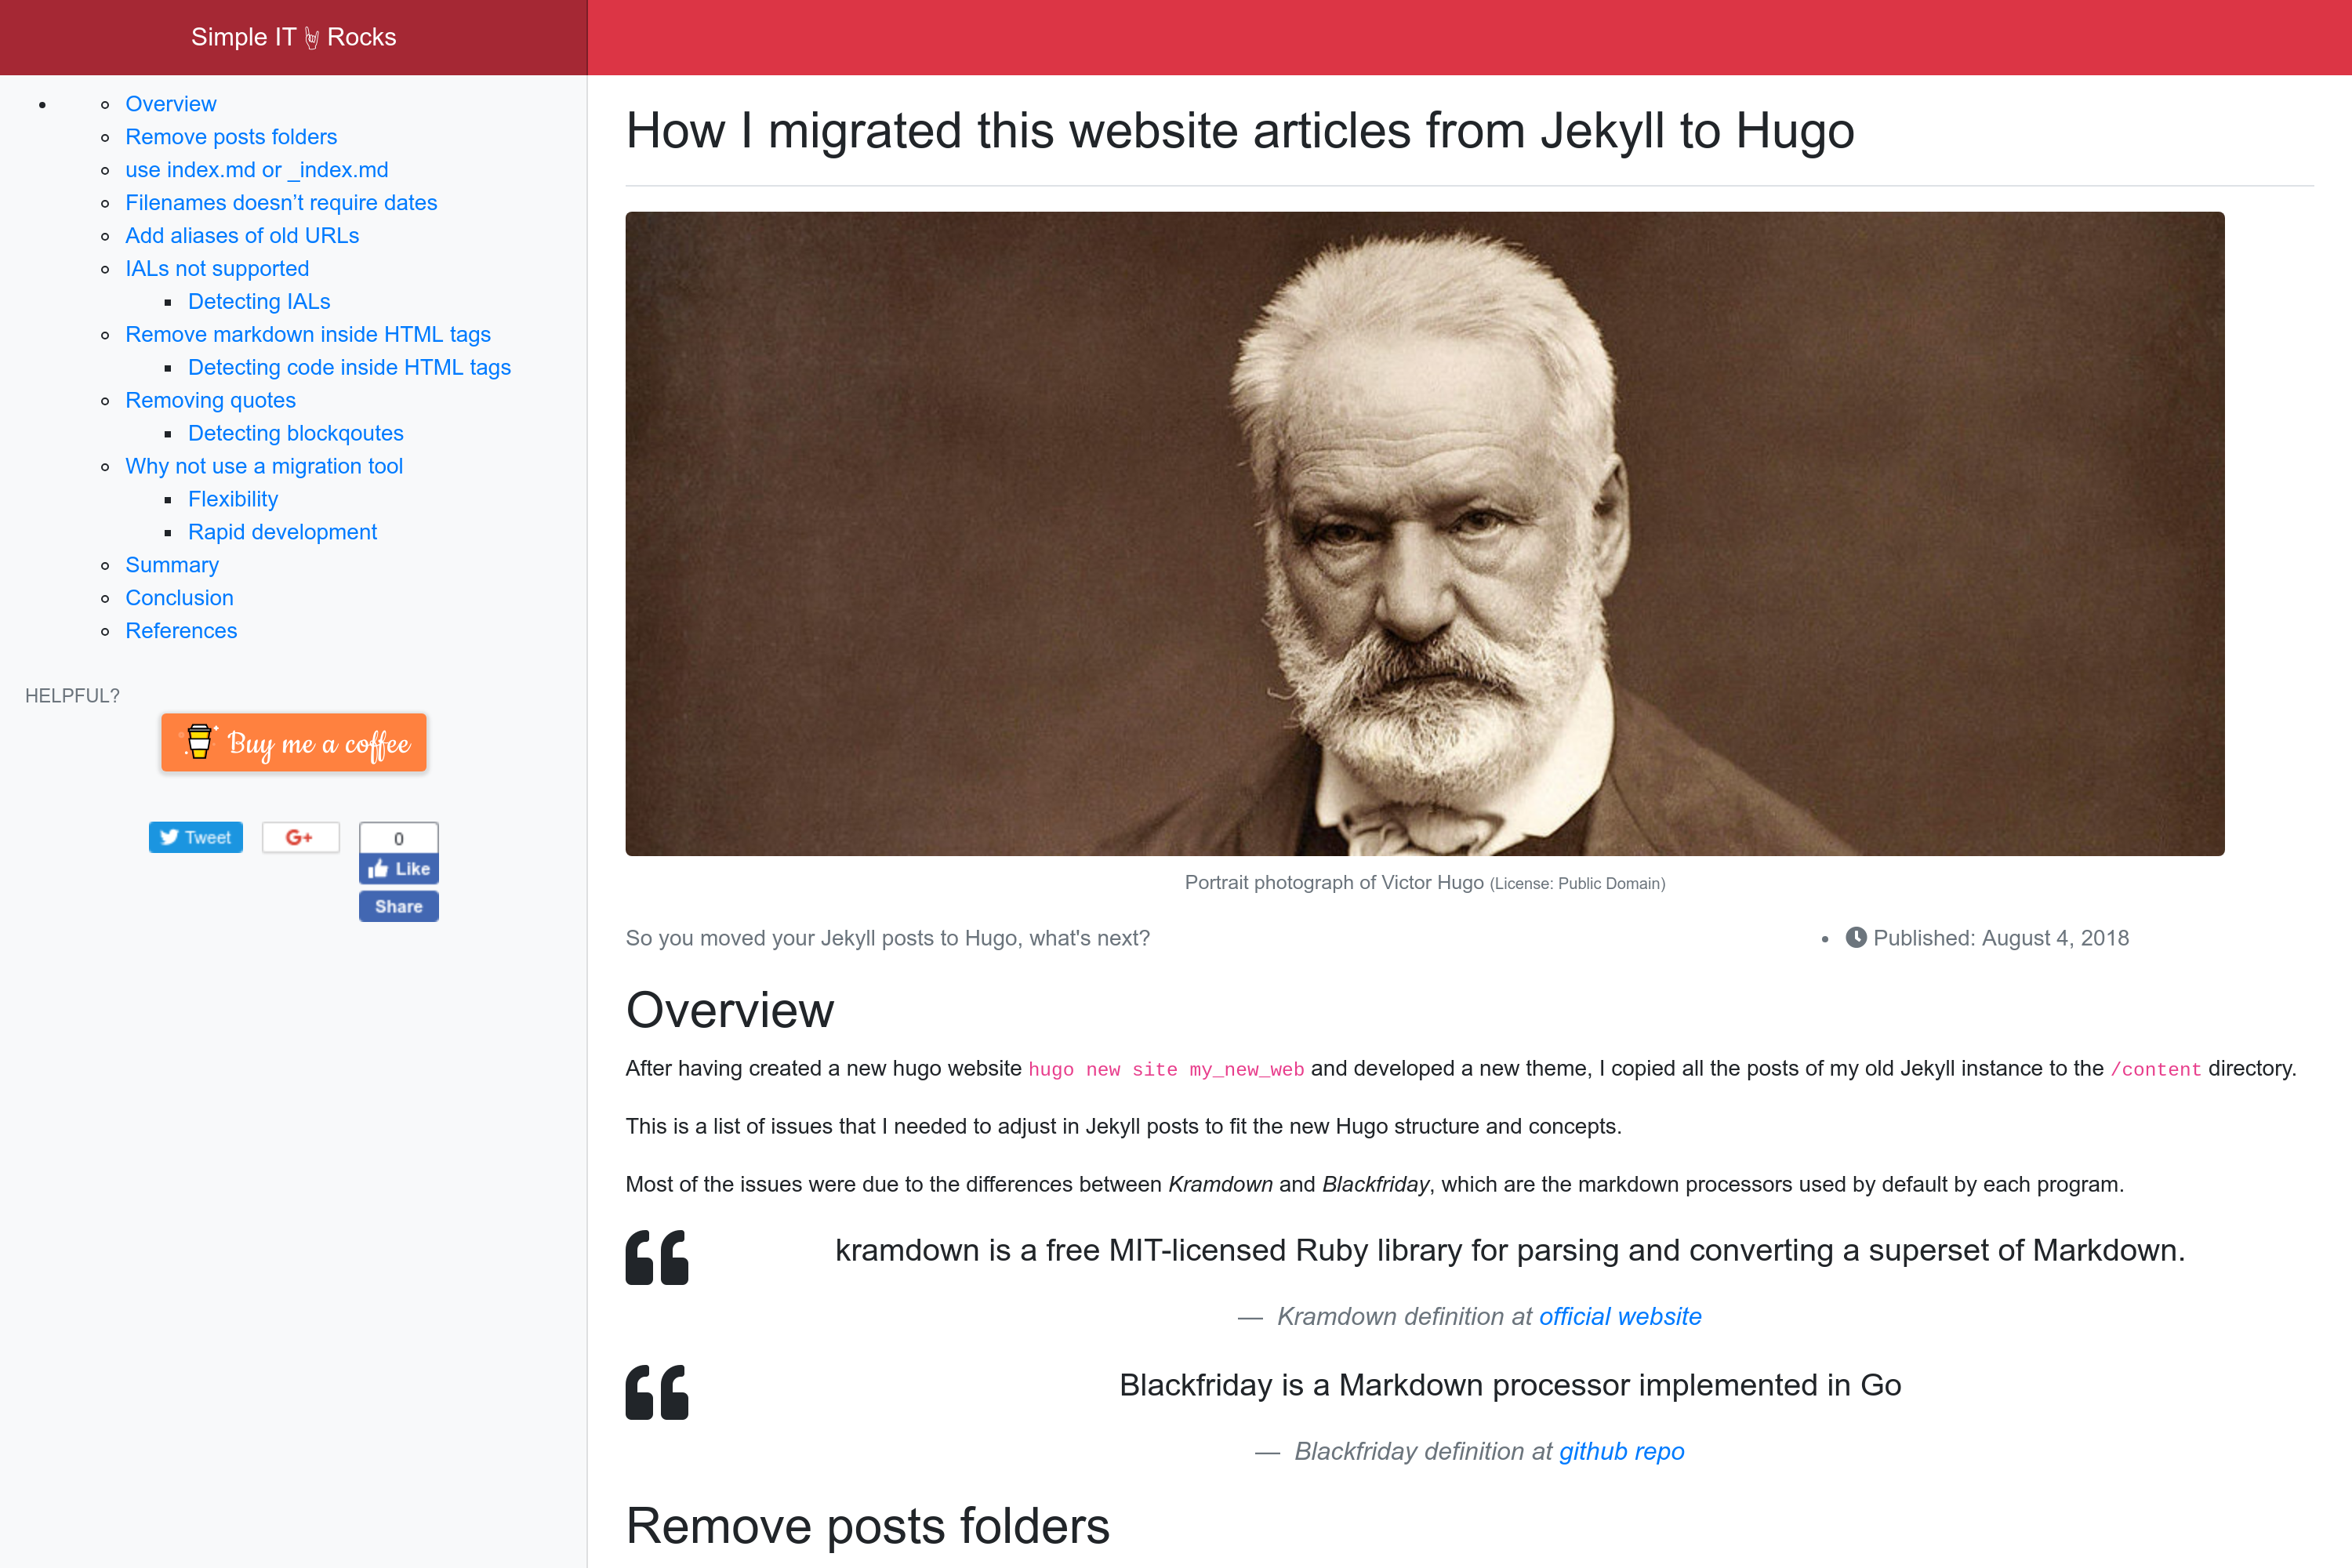
单页屏幕截图
贡献
你发现了一个错误或对新功能有想法吗?请随时使用问题跟踪器告诉我。或者直接提交 pull request。
使用该主题的网站
使用此主题的 Hugo 网站
- https://simpleit.rocks
- https://therunningsecret.com
通过 Pull Request 在这里添加你自己的网站!
参考
- Github 仓库:https://github.com/marcanuy/simpleit-hugo-theme.git
- Hugo 主题站点页面:https://themes.gohugo.com.cn/simpleit-hugo-theme/
- 分层内容演示:https://marcanuy.github.io/simpleit-hugo-theme/
- 扁平演示:https://themes.gohugo.com.cn/theme/simpleit-hugo-theme/
许可证
此主题根据 MIT 许可证发布。有关更多信息,请阅读许可证。