Hugo 主题
Gruvbox
一个复古风格的 Hugo 主题,灵感来自 gruvbox。柔和的颜色对比度高,易于区分,赏心悦目,并具有浅色和深色调色板。

Gruvbox Hugo 主题
一个复古风格的 Hugo 主题,灵感来自 gruvbox,用于构建安全、快速且对 SEO 友好的网站。
此主题易于定制,具有任何程序员都喜欢的功能。
我从 Hello Friend 和 Doks Hugo 主题中获得了很多灵感。
演示 https://hugo-theme-gruvbox.schnerring.net/
免责声明:项目状态
此主题仍处于早期开发阶段。查看问题以了解仍缺少的内容。
亮点
- 使用 Prism 进行代码高亮显示
- 使用 Flex Search 进行全文搜索
- 使用结构化的 JSON Resume 数据显示您的简历
- 集成图像优化,使用下一代图像格式和延迟加载
- 深色模式,还会更改 Prism 主题
- 来自 Gruvbox 调色板的动态颜色选择
- 可扩展以满足您的需求
- 响应式、移动优先设计
- 带有 Tabler Icons 的精美 SVG 图标
非常感谢使此主题成为可能的软件作者!❤️
快速入门
该主题需要扩展的 Hugo,因为它使用 Sass/SCSS。您还需要安装 Go,因为该主题使用 Go 模块。
git clone存储库并cd进入- 运行
npm ci以安装依赖项 - 运行
hugo server
安装主题
创建一个新的 Hugo 网站
hugo new site example.com
cd example.com/
将网站初始化为 Hugo 模块
hugo mod init example.com
将以下内容添加到 hugo.toml 文件中
[markup]
  # (Optional) To be able to use all Prism plugins, the theme enables unsafe
  # rendering by default
  #_merge = "deep"

[build]
  # Merge build config of the theme
  _merge = "deep"

# This hopefully will be simpler in the future.
# See: https://github.com/schnerring/hugo-theme-gruvbox/issues/16
[module]
  [[module.imports]]
    path = "github.com/schnerring/hugo-theme-gruvbox"
  [[module.imports]]
    path = "github.com/schnerring/hugo-mod-json-resume"
    [[module.imports.mounts]]
      # This will add the sample Richard Hendricks CV data
      source = "data"
      target = "data"
    [[module.imports.mounts]]
      source = "layouts"
      target = "layouts"
    [[module.imports.mounts]]
      source = "assets/css/json-resume.css"
      target = "assets/css/critical/44-json-resume.css"
  [[module.mounts]]
    # required by hugo-mod-json-resume
    source = "node_modules/simple-icons/icons"
    target = "assets/simple-icons"
  [[module.mounts]]
    source = "assets"
    target = "assets"
  [[module.mounts]]
    source = "layouts"
    target = "layouts"
  [[module.mounts]]
    source = "static"
    target = "static"
  [[module.mounts]]
    source = "node_modules/prismjs"
    target = "assets/prismjs"
  [[module.mounts]]
    source = "node_modules/prism-themes/themes"
    target = "assets/prism-themes"
  [[module.mounts]]
    source = "node_modules/typeface-fira-code/files"
    target = "static/fonts"
  [[module.mounts]]
    source = "node_modules/typeface-roboto-slab/files"
    target = "static/fonts"
  [[module.mounts]]
    source = "node_modules/@tabler/icons/icons"
    target = "assets/tabler-icons"
  [[module.mounts]]
    # Add hugo_stats.json to Hugo's server watcher
    source = "hugo_stats.json"
    target = "assets/watching/hugo_stats.json"
安装主题
hugo mod get
初始化 NPM package.json 并安装依赖项
hugo mod npm pack
npm install
运行 Hugo
hugo server
更新主题
更新 Hugo 模块
hugo mod get -u
hugo mod tidy
更新 NPM 依赖项
hugo mod npm pack
npm install
颜色
有两个选项可用于配置主题颜色
defaultTheme:dark或light(默认为light)
用户首次访问网站时的默认主题颜色。操作系统或用户首选项会覆盖此设置。有关更多详细信息,请参阅此评论。themeColor:gray、red、green、yellow、blue、purple、aqua或orange(默认为blue)
用于链接、标题等的主题颜色。themeContrast:soft、medium或hard(默认为medium)
主题背景颜色
Prism
该主题允许通过 hugo.toml 参数自定义 Prism
[params]
  [params.prism]
    languages = [
      "markup",
      "css",
      "clike",
      "javascript"
    ]
    plugins = [
      "normalize-whitespace",
      "toolbar",
      "copy-to-clipboard"
    ]
在我看来,这是该主题最酷的功能。其他 Hugo 主题通常包含一个预先配置的 Prism 版本,这会使更新和更改跟踪变得复杂,并使主题的代码库与第三方 JavaScript 混淆。
Prism 主题是不可配置的,因为与深色模式功能集成。在颜色模式之间切换会在 github.com/PrismJS/prism-themes 中将 Prism 主题在 gruvbox-dark 和 gruvbox-light 之间切换。
查看演示网站上的 Prism 展示以获取示例
探索 Prism 功能
运行 npm install 后,像这样探索 Prism 功能
# Languages
ls node_modules/prismjs/components

# Plugins
ls node_modules/prismjs/plugins
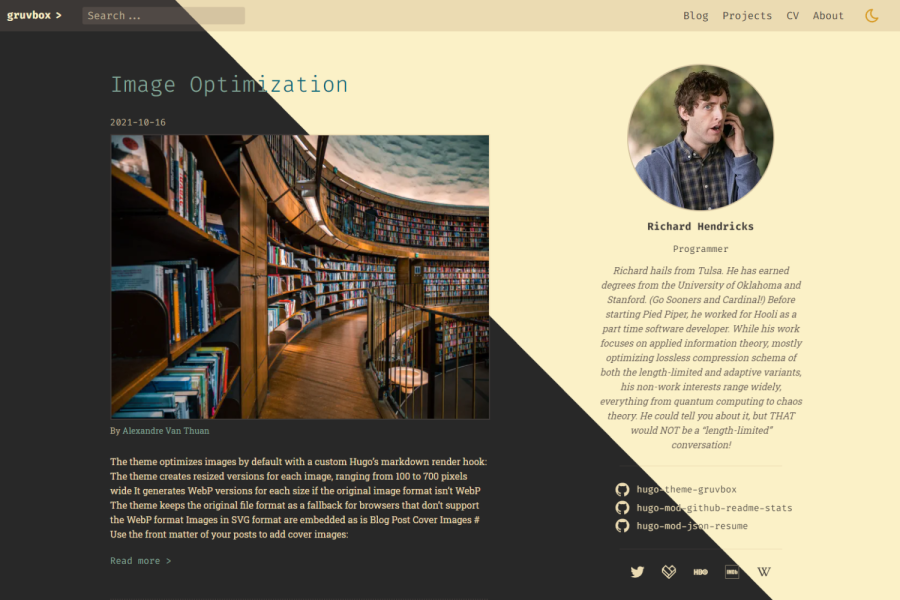
图像优化
默认情况下会优化图像,而无需使用短代码。自定义渲染钩子完成所有繁重的工作(请参阅 render-image.html)。
默认情况下,该主题创建的调整大小的图像宽度从 300 像素到 700 像素不等,增量为 100 像素。
如果图像格式不是 WebP,则会转换图像。原始文件格式将作为不支持 WebP 格式的浏览器的回退。
请注意,仅处理属于页面包的图像。如果从 static/ 目录或外部源提供,则将显示图像,但不会进行处理。
此外,所有图像都会延迟加载,以节省用户的带宽。
配置
默认质量为 75%。请参阅官方的 Hugo 文档图像处理配置。通过将以下内容添加到 hugo.toml 文件来更改它
[imaging]
  quality = 75
更改调整大小的行为
[params]
  [params.imageResize]
    min = 300
    max = 700
    increment = 100
标题

演示网站提供了您可以查看的示例。我也在我的网站上使用该主题。
博客文章封面
通过在帖子的前言中定义博客文章封面来添加它们
---
cover:
  src: my-blog-cover.jpg
  alt: A beautiful image containing interesting things
  caption: [Source](https://www.flickr.com/)
---
嵌入视频文件
使用视频短代码从页面资源嵌入视频文件。
页面包结构如下所示
embed-videos/
|-- index.md
|-- my-video.jpg
|-- my-video.mp4
|-- my-video.webm
您可以像这样嵌入 my-video
{{< video src="my-video" autoplay="true" controls="false" loop="true" >}}
简码会查找文件名匹配 my-video* 的媒体文件。对于每个 video MIME 类型的文件,都会添加一个 <source> 元素。第一个 image MIME 类型的文件会被用作 poster(缩略图)。它将呈现以下 HTML
<video
  autoplay
  loop
  poster="/blog/embed-videos/my-video.jpg"
  width="100%"
  playsinline
>
  <source src="/blog/embed-videos/my-video.mp4" type="video/mp4" />
  <source src="/blog/embed-videos/my-video.webm" type="video/webm" />
</video>
您可以设置 Markdown caption,将 <video> 包裹在 <figure> 中。
此外,该简码允许您设置以下属性
| 属性 | 默认值 |
|---|---|
| autoplay | false |
| controls | true |
| height | |
| loop | false |
| muted | true |
| preload | |
| width | 100% |
| playsinline | true |
在此处了解有关 <video> 属性的更多信息。
SEO
根据欧洲版权指令,需要在搜索引擎结果中选择显示代码片段。
默认情况下,每个页面(404 页面除外)都包含 index, follow, max-snippet:-1, max-image-preview:large, max-video-preview:-1 robots 元值,选择启用所有代码片段功能。
您可以在页面的 front matter 中覆盖 robots 元值
---
robots: noindex, nofollow
---
社交分享链接
在 Hugo 配置中像这样配置社交分享链接
[params]
  [[params.socialShare]]
    iconSuite = "simple-icon"
    iconName = "facebook"
    formatString = "https://#/sharer.php?u={url}"
  [[params.socialShare]]
    iconSuite = "simple-icon"
    iconName = "reddit"
    formatString = "https://reddit.com/submit?url={url}&title={title}"
  [[params.socialShare]]
    iconSuite = "tabler-icon"
    iconName = "outline/mail"
    formatString = "mailto:?subject={title}&body={url}"
使用 iconSuite 设置来指定用于社交分享链接的图标套件:simple-icon 或 tabler-icon。使用 iconName 设置从套件中选择一个图标。Tabler 图标有两种不同的样式,filled 和 outline。您必须相应地添加 iconName 的前缀,例如 iconName = "outline/sun"。
formatString 支持以下占位符
{url}被替换为帖子的.Permalink{title}被替换为帖子的.Title
要启用社交分享链接,请在帖子的 front matter 中设置以下内容
---
socialShare: true
---
查看 GitHub 上的社交分享 URL 仓库,了解更多格式字符串。
网站图标
网站图标和相应的标记是使用免费的 RealFaviconGenerator.net 生成的。
替换默认网站图标的最简单方法是使用 RealFaviconGenerator.net 生成它们,并将生成的文件放入 static/ 目录中。
可扩展性
您可以通过覆盖 layouts/partials 目录中的以下局部模板来扩展主题,这些局部模板默认情况下是空的占位符文件
head/head_start.html
在<head>开头的自定义 HTMLhead/head_end.html
在<head>末尾的自定义 HTMLfooter_end.html
在<body>末尾的自定义 HTMLcomments.html
帖子末尾的评论
示例:向主题添加 KaTeX 支持
KaTeX 是一个快速、易于使用的 JavaScript 库,用于在 Web 上渲染 TeX 数学公式。让我们通过 npm 将其添加到主题中。首先,将以下内容添加到 package.hugo.json 文件中
"dependencies": {
  "katex": "^0.16.8"
}
然后运行 hugo mod npm pack 将 package.hugo.json 依赖项与 package.json 同步。之后运行 npm install。然后,我们需要通过将以下内容添加到 config/_default/module.toml 文件中,将 node_modules/katex 文件夹挂载到 Hugo 的虚拟文件系统中
[[mounts]]
  source = "node_modules/katex"
  target = "assets/katex"
然后,我们可以将以下内容添加到 layouts/partials/head/head_end.html
{{ if .Params.katex }}
  {{ $katexCSS := resources.Get "katex/dist/katex.min.css" }}
  <link
    rel="stylesheet"
    href="{{ $katexCSS }}"
    {{ if hugo.IsProduction }}
      integrity="{{ $katexCSS.Data.Integrity }}"
    {{ end }}
    crossorigin="anonymous"
  />

  {{ $katexJS := resources.Get "katex/dist/katex.min.js" }}
  <script
    defer
    src="{{ $katexJS.RelPermalink }}"
    {{ if hugo.IsProduction }}
      integrity="{{ $katexJS.Data.Integrity }}"
    {{ end }}
    crossorigin="anonymous"
  ></script>

  {{ $autoRender := resources.Get "katex/dist/contrib/auto-render.min.js" }}
  <script
    defer
    src="{{ $autoRender.RelPermalink }}"
    {{ if hugo.IsProduction }}
      integrity="{{ $autoRender.Data.Integrity }}"
    {{ end }}
    crossorigin="anonymous"
    onload="renderMathInElement(document.body);"
  ></script>
{{ end }}
剩下的唯一事情是在我们内容的 front matter 中启用 KaTeX
---
title: "Hello World"
description: "The first post of this blog"
date: 2021-03-14T15:00:21+01:00
draft: false
katex: true
---

I'm a .NET developer by trade, so let's say hello in C#!
配置标签云
该主题附带一个标签云局部模板。它包含在侧边栏中,但默认情况下禁用。如果您希望配置它,请将以下内容添加到 hugo.toml 文件中的 [params] 部分
[params.tagCloud]
  enable = true
  minFontSizeRem = 0.8
  maxFontSizeRem = 2.0
删除侧边栏
如果您想删除侧边栏,请添加一个空的 data/json_resume/en.json 文件,内容如下
{
  "$schema": "https://raw.githubusercontent.com/jsonresume/resume-schema/v1.0.0/schema.json",
  "basics": {},
  "work": [],
  "volunteer": [],
  "education": [],
  "awards": [],
  "certificates": [],
  "publications": [],
  "skills": [],
  "languages": [],
  "interests": [],
  "references": [],
  "projects": [],
  "meta": {
    "canonical": "https://raw.githubusercontent.com/jsonresume/resume-schema/master/resume.json",
    "version": "v1.0.0",
    "lastModified": "2017-12-24T15:53:00"
  }
}
扩展 CSS
该主题使用 PostCSS 以及以下插件
- postcss-import
- postcss-url
- postcss-nesting
- postcss-custom-media
此外,如果使用 hugo -e production 构建站点,则会使用以下插件
- postcss-preset-env
- 用于最小化的 cssnano
- @fullhuman/postcss-purgecss
在 assets/css 中存在两个文件夹,critical 和 non-critical。 critical 中的文件在构建时被连接并内联到 <head> 元素中。样式主要针对首屏内容。尽量将内联 CSS 保持在最低限度,因为它不能被缓存,并且会内联到每个页面中。 non-critical 中的文件被连接到单个文件中,并作为 <style> 包含。大多数样式都在那里。
文件按其文件名的字典顺序连接。文件名以两位数字和一个连字符开头:NN-。文件顺序在 Linux 和 Windows 之间可能不同,因此使用此约定可提高跨平台兼容性。如果您熟悉 Xorg,您可能知道这种方法。
您可以像这样将新的 CSS 文件添加到 PostCSS 管道
critical/50-foo.cssnon-critical/05-bar.cssnon-critical/99-last.css